skip to main |
skip to sidebar
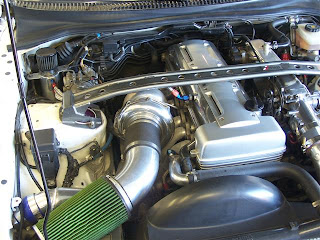
 Mar 07This custom install was needed to help finish off the impressive nature of the car. With over 600 wheel horsepower, the sytem needed some much deserved attention to catch all eyes at the shows. The roll cage was put in and unfortunately (for us) wasn't a bolt in one, this made the install a bit more difficult. The customer supplied some mtx gear, which you'll see in one of the pics how massive the woofer is. It definately is a finger pincher if you're not careful. We fiberglassed the bottom of the enclosure and braced it from the inside, we also bolted it to the roll cage in case of any accidents. We used a matching black vinyl to finish the install off, real tight tolerances provided a real snug fit. Stainless steel perforated metal was used to cover the amps, and we also devised a couple small cubbys for storage behind the seats.
Pictures:
 Mar 07Trying to do something a bit different from everybody else's setup is what we always try to do. For the water methanol, we came up with the idea of using three separate 4" diameter aluminum tubes stacked one on top of the other. With a new interior panel fabricated from scratch to show them off and blend them seamlessly into the trunks interior. Each tank would have fittings that would allow the water/meth mixture to flow between all three tanks, with the primer pump being installed on the bottom and a filler tube and cap on the top. With the tanks connected together there is just over 1.5 gallons available. Dustin from PDX Tuning cut and welded the tanks together, because of fitting into a cramped space one tank is slightly shorter than the other two. To make everything work and fit into the car I had to make a temporary jig to hold the tanks in their exact position in relation to each other and their position in the car. The jig also acted as a starting point in which the new trunk panel would be fabricated from and would also be used to mock up all the connecting lines.
All said and done all the fittings/connections between the tanks will be hidden behind the panel on the end of the tanks. With just the middle of the tanks showing we should have a pretty clean little setup. Since the trunk area of the car holds our Perfect Fit Enclosure and Amplifier Rack all covered in matching O.E.M. carpet I wanted to add some color to the mix. The tanks, along with all the new custom piping for the rotated manifold got shot a candy red color. I'm real happy with the way they turned out, should stand out and make a nice contrast to the dark carpet everywhere.
The wood jig got transfered over as a template to make a plexiglass version. I used 3/4 inch clear plexi that is polished on the top and bottom but the face is lightly sanded. All said and done we'll use some red led's to shoot a little light up through it. The light will pass through the clear sections, but light up the sanded edges making for a nice accent.
The top portion of the trim panel has an oval / pill shaped insert flushed into it. This will also be made from plexiglass and allows the filler tube to come through. There's a couple little things planned for it, lazer etched markings and a led indicator for tank levels. I transfered the oval pill shaped insert that goes into the top of the trunk trim panel into 1/4 inch plexi glass and dropped it off to get lazer etched. Nothing too fancy, just labeling the mixture and then a bar graph to indicate the tanks level. This will be usefull when filling the tanks as well as checking their level when in use. As the tanks fill up the led's light up, tanks empty & the led's turn off. I've got wires heading up front as well so later I'll have the same indicators for viewing when driving.
The plexi glass mounting for the tanks light up with 8 red led's on each side, a total of 16 for all the tanks. Hard to find led's in the configuration I needed so I just made my own. 4 led's got soldered to a board and wired with the proper resistors for the 12 volt application. The led's sit just under the edge of the plexi, shinning light up the vertical edge and into the tank hole cutouts. Both the tank levels and lighting is wired off the trunk trigger, trunk open you have light, trunk closed and the led's go out. Didn't get time but we'll light up the rest of the etched words later, probably in white.
Pictures:


 Mar 07


.jpg)
.jpg)


